
Although the look was routine, I was content. But now the sun is coming out to play, so let’s shake things up. For my fellow winter moles who’d prefer to stay under the comforters, it’s time to shed the faux fur coats and let your hair down. I'll take a cue myself and start waking up a bit earlier. And if I can do it, so can you.
If you’re looking to get out of your old beauty routine, below are a few looks that anyone can try. There’s a mix of hair inspiration, trendy head pieces, and fun, versatile jewelry.
Look #1: New Age Grunge
Top knots are adorable and one of my favorite hairstyles for on-the-go. What's funkier than one? Four mini knots spread evenly around the crown of your head. Don't worry about fly aways or pieces that won't stay in place. I'm a big fan of messy hair, and it also ups the grunge factor. Chokers have been rampant around every fashionista's neck recently, but the intricate design of the one below makes it a crowd pleasing, stand-out piece. Because it doesn't use a lobster clasp, but mesh ribbon, I sometimes choose to wear it has a headband. Two points for versatility! Complete the look with a dark matte lip color, and you're good to go.


Sunglasses from ASOS // Choker from Buffalo Exchange
//
Look #2: Western Chic
Western vibes are still trending this season. While most shy away from bolo ties, it's a fun way to try the trend without feeling like you're wearing a costume. To compliment the tie, add a braided crown. I love braids. Although I don't wear them that often, it's hard to deny the attraction. I let the bangs for this mannequin hang, but I typically like to use all of the hair. For more flare and femininity, tie a dainty scarf around your neck.


Bolo tie from Buffalo Exchange // Neck scarf from Value Village
//
Look #3: Feminine Sophistication
Because the hairstyle is the same as in the last post, I was going to skip this look, but I just could not get over the combo of the sunglasses and necklace. These glasses are rimmed with a golden floral design. The necklace is decorated with painted flowers. The two create a pretty team that's perfect for business casual luncheons or romantic dates at the park.


Sunglasses from Civvies New & Recycled Clothing // Necklace from Buffalo Exchange
//
Look # 4: 70's Glam
This is a casual look that would look great just about anywhere. What's special about this ensemble is the combination of the headgear. Tying a printed scarf underneath a brimmed hat puts a refreshing spin your typical hat days. I started using this technique myself last fall. Then, I was tucking all of my hair in the scarf to protect it from the frigid air. Now, the look is something I can carry over to spring for added style. I usually tie the knot in the front and center of my head, but feel free to play around with the placement.


Hat from Buffalo Exchange // Head scarf given by my granny
//
Look #5: 70's Glam
This year, the fashion industry is looking to the 70's for decade inspiration. Large headbands and scarfs across your forehead is a fun way to try the trend. If you have a small forehead like me, though, you can sometimes look like you're drowning in the fabric. That's not always a problem, but if it bothers you, just try twisting the ends of the scarf until you slim down the thickness. Add a pair of flared jeans, platform heels, and a fringe purse, and you'l be good to go.


Head scarf from Urban Outfitters // Blush stone necklace from Buffalo Exchange // Gold chain necklace from H&M
//
Look #6: 90's Kid
This look goes out to all of my trendy, eccentric readers. While circle sunglasses have been around for a while, the cut out design of these are like none other. You'll definitely get noticed, and when you top it off with quirky headgear like this silver bucket hat, you'll stop people in their tracks. Add a few side braids for a fun and playful finish.


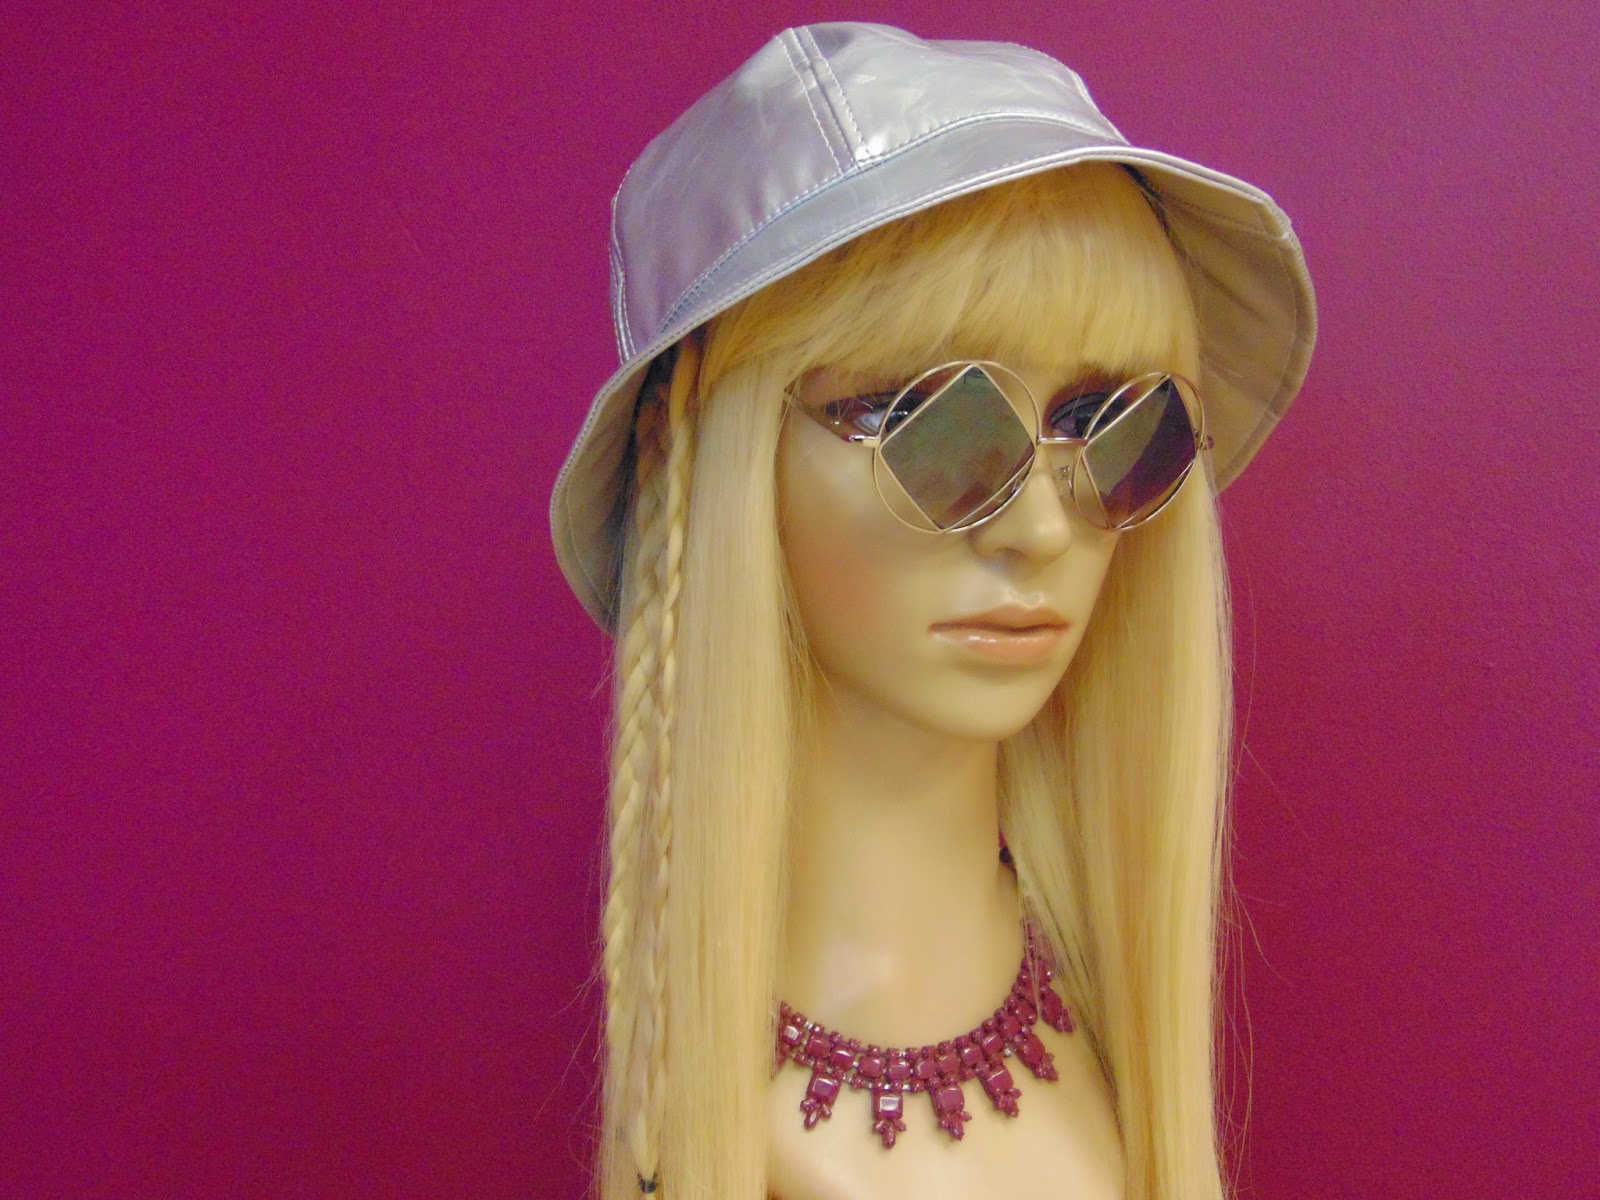


Bucket hat from local urban store // Sunglasses from Lucky Exchange // Necklace from Buffalo Exchange
//
Look #7: Pretty and Bohemian
Of course, spring and flower crowns go hand-in-hand. The messy knot of this look balances out the pretty crown and keeps it casual and cool. To replicate the hairstyle, it's as easy as gathering your hair somewhere comfortable and pulling on a few strands to loosen the vibe. Section off pieces of hair from the front to make a braid and wrap it around your bun to cover up any scrunchies. Your bohemian look is complete!


Flower Crown from Claire's
//
I encourage everyone to try something new this season. That’s
what spring is all about, right? If you typically play it safe, try a pair of
bold statement sunnies. If you’re more on the wild side, downsize the amount
of jewelry for a simple and effortless look. What’s your favorite beauty ensemble for spring? Let me know
by commenting below!
Until next time, wanderers.


